So I was getting this in an InMotion install.
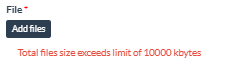
How to increase the PHP Max Upload Size in cPanel
Technical ramblings | Mark Brooks


Good self service Web Hosting Management software is just a game changer for Dev Ops work.
Every year I learn a bit more and every year they probably improve it a bit more. I am really very far off the cutting edge so I can’t speak to cutting edge improvements of the whole platform but I can talk to the options that I am continually learning.
.
AND NOW……
Being able to quickly manage the update PHP versions is just amazing…
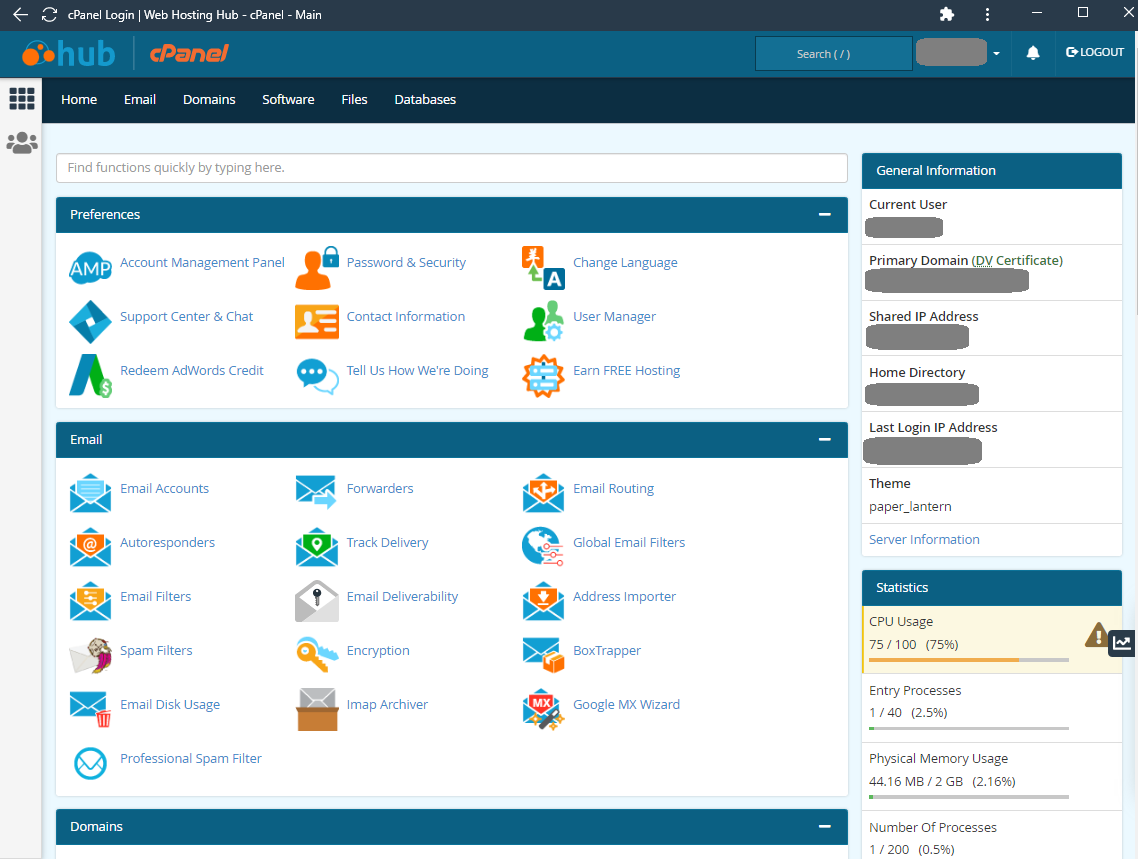
cPanel:
Log into cPanel
.
Yes its that easy
Things I want next
Front end cPanel at InMotion backend SQL Server in Azure
Front end cPanel at InMotion backend Postgres Server in Azure
Postgres backends in cPanel
cPanel rocks
and so does PHP and PHPRunner
and AI when it can learn to spell and count!
(yes the picture annoys me as well)
There are no shortages of articles on how to take a backup of a MySQL or MariaDB database from cPanel however given how important it is I like to write these things down showing how I accomplished this for my own reference. Its extremely easy to do a download which means that you should not have any opportunity or reason not to do it regularly if you have an important database that for instance is part of a web application.
1. Enter your given cPanel management portal.
2.Find the database section and select the phpMyAdmin icon.

3.Select the database you are interested in from the lefthandside.

4.Click export in the menu section and then its just a case of clicking go. An SQL will be downloaded to the download directory (on a windows machine). And keep this and you can run this to create a new database.
And its very easy to go in and check if its ok you can use any good ide or you could change the suffix to TXT and then just look at it in word.
Happy backing up.!!!

When it comes to relational databases I used to think right there’s
I know there is MariaDB as well and I know that is a direct substitute for MySQL I think I might be using it but you know what I’m not really sure. Whenever I look things up I quite often look for MySQL and to date any information obtained using those parameters have worked when executed against my databases through phpMyAdmin.
Should I be using MariaDB or hang on – am I???
Well turns out they are so similar that you might be using and not even know it. Turns out my hosting company uses MariaDB instead of MySQL but you might be under the impression you are still using MySQL. Why? Because if you are like me and you are using cPanel all the branding is still MySQL. I suspect this is actually very usual for anyone using cPanel.
Here’s my Database panel in cPanel

MySQL written all over the place even with a registered trademark symbol reinforced with the Dolphin MySQL logo.
Additionally phpMyAdmin never really mentions much about the database server you are using. And look it up and phpMyAdmin is often described as the MySQL client.
Am I using MySQL —— NOPE
Open up phpMyAdmin
Open the SQL panel and execute the following query.
SHOW VARIABLES LIKE "%Version%";
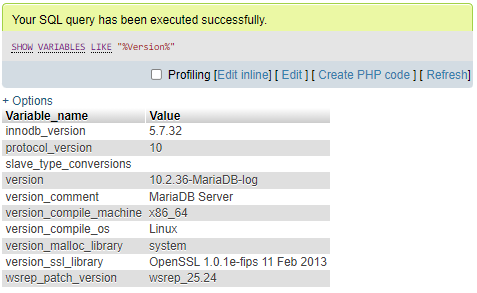
So despite all the logos and branding to the contrary I’m using MariaDB for this blog! Useful to know. I don’t know if it was MariaDB when I signed up in 2014 or not but this blog has been running continuously for 7 years and 7 months (at date of publishing this article) with no issues.
Kinsta on the differences between MariaDB and MySQL
I’m happy with being on MariaDB just because I am not mad about Oracle. Turns out I’m not alone in that position. Google / AliBaba and the European Investment Bank are all heavily invested in MariaDB which is probably why so many hosting companies actually run MariaDB in the background. There are big companies on MySQL but MariaDB is not going anywhere and many like me might have been running everything on MariaDB without even knowing it for years!
I note in the Wiki article they state as a difference between MySQL and MariaDB Geographical Function support – not sure that part is true – I have asked Wikipedia to investigate , according to my research there is support via extensions although I have no personal experience of their use.
Automation is so important these days and the following details how to create a simple cron job using CPANEL to send out a regular email. You can automate anything but I was wanting to use an example that would send me something to show that it was working. So I set up the following as an example to send out an email to myself every 5 minutes.
See also
How to Set Up and Run a Cron in CPanel
I am going to focus on a single method. The above link details how to do it using the command line on a linux server which may be helpful. I am concentrating on using the cpanel interface here.
Step 1 : Sign into your cpanel administrative panel.
Step 2 : Look to the Advanced Tab and identify the Cron Jobs Icon

Entering the Cron Jobs panel you will be presented with the following screen.
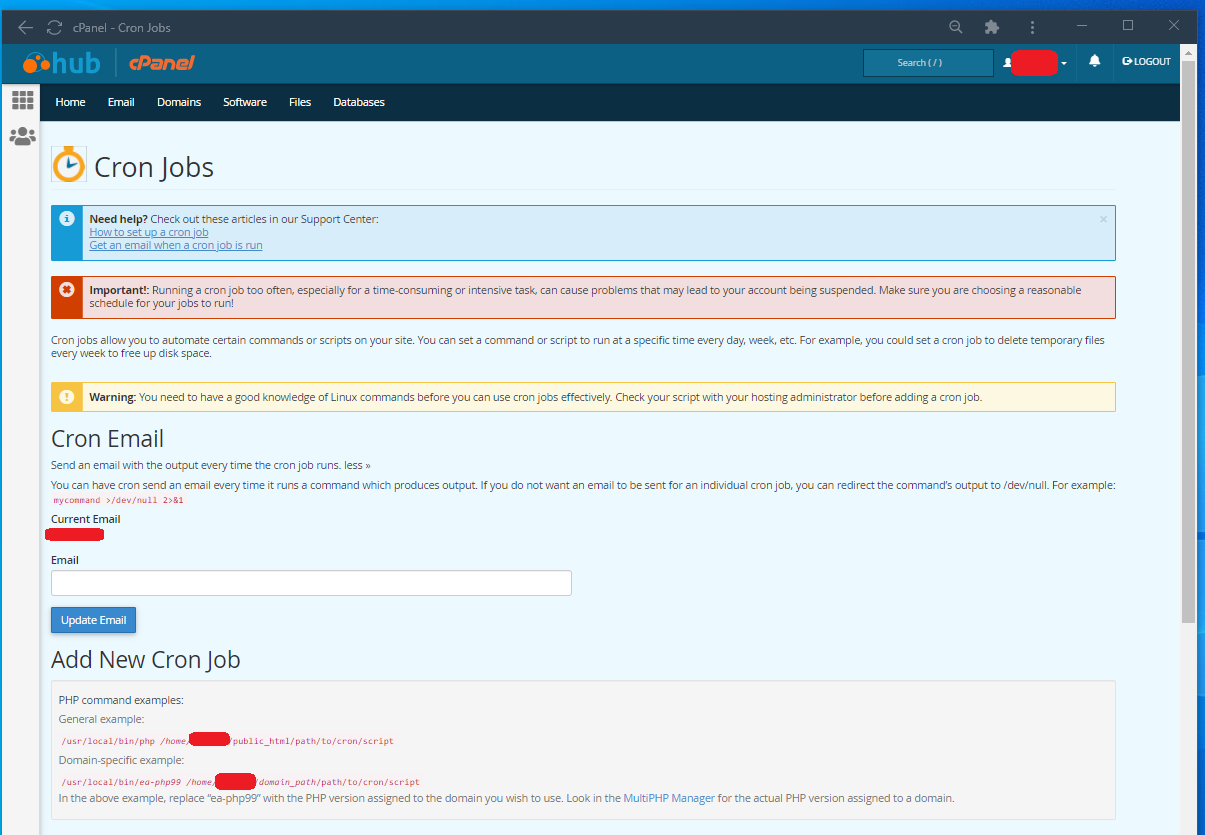
Leave the Update email button…
Step 3 : Identify the PHP script you wish to run and load it into a directory taking note of where you have noted.
(You will need to point CRON to run your specific script)
If you don’t have a script try this one. It uses the php mail function to send out a simple email to whatever target email you want which allows you to
<?php
$to_email = 'targetemail@targetcompany.com';
$subject = 'Mail sent using a Cron Job Script';
$message = 'Hello and best wishes';
$headers = 'From: noreply@yourcompany.com';
mail($to_email,$subject,$message,$headers);
?>
Step 4 : Save the above PHP script somewhere and load it to your server so that taking a note of where you put it.
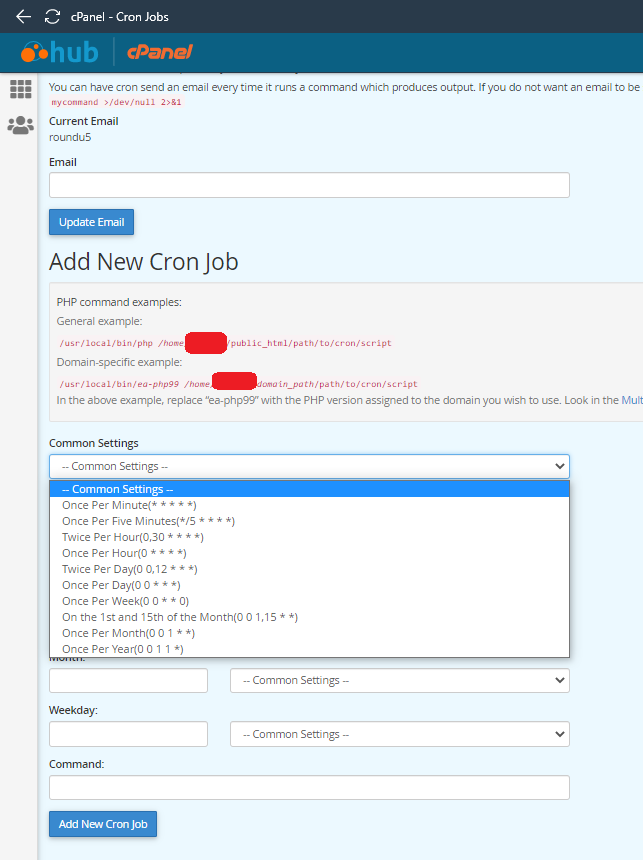
Now I would start and set this to run up every 5 minutes just to test that it is working –
In the common settings there is s drop down which has a range of settings everything from once a minute to once a year select once every 5 minutes.
Step 6 : Set the command to be run.
Now this is the only really tricky part to the whole thing. I haven’t found a great deal of documentation on the syntax of the command that you should enter. I found two different syntaxes that seemed to work.
/usr/local/bin/php /home/youruserid/public_html/cronscripts/testrun.php
or
php -q /home/youruserid/public_html/cronscripts/testrun.php
Then simply hit the Add New Cron Job button and then wait for five minutes – if everything has completed successfully there will an additional line in the cron jobs listing and you will get an email every 5 minutes.
Happy Cron Jobbing.
One interesting point in my cpanel host was that you could limit the cron job to the domain which may be necessary as you become more proficient with the kind of jobs that you are wanting to run in your cron job.
As previously stated there are a lot of hosted services that come with CPANEL installed. We have already indicated how it is possible to create a subdomain that can be used to host php based sites.
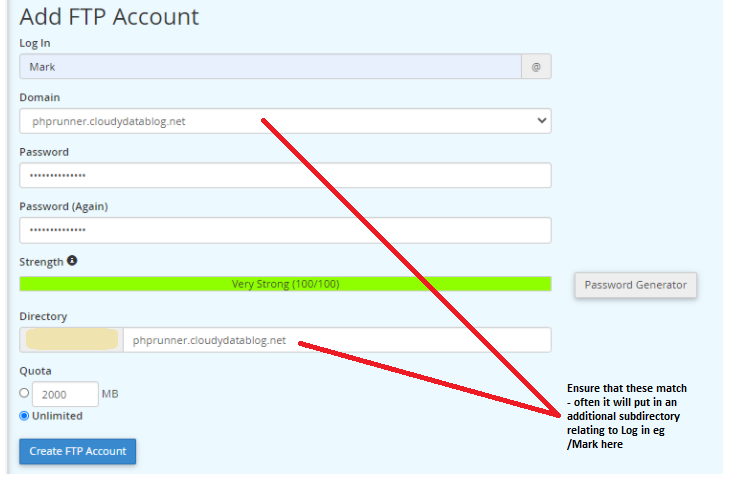
If you are using a design environment you will want to set up an FTP account that can be used to upload your applications too. It is worth just making sure that you are familiar with this.
Firstly log into your account at your host cpanel.
Once configured it should appear in your FTP Accounts section here
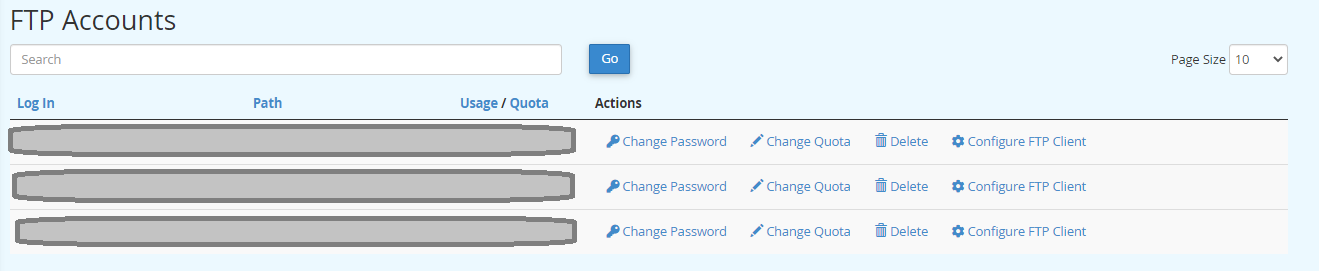
If you want to see the FTP parameters for upload hit the related Configure FTP Client
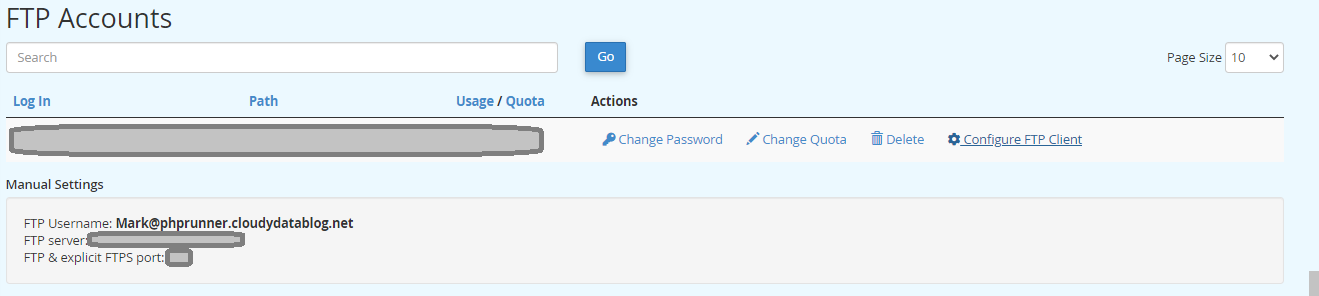
CPANEL only allows you to create against domains and subdomains that already exist so this should be you ready to install software.
Two changes to the .htaccess that are easy to implement and will improve the security of PHP websites.
If you have subdomains that you would like to restrict access to and they are running a PHP site. You can use the .htaccess file to allow or deny access.
A very uncomplicated way is if you have a particular site that you would like to ringfence why not just reduce access to it to one location… Your home..
<RequireAny>
require ip x.x.x.x
require ip y.y.y.y
</RequireAny>
You can also use this to allow or block entire countries
Block a country from your site
And if you would like to find out the IP address range required to block you can find that here.
The nice thing about this is that it works on subdomains. Using the CPANEL file manager just go into the subdomain find the htaccess file and block accordingly.
And
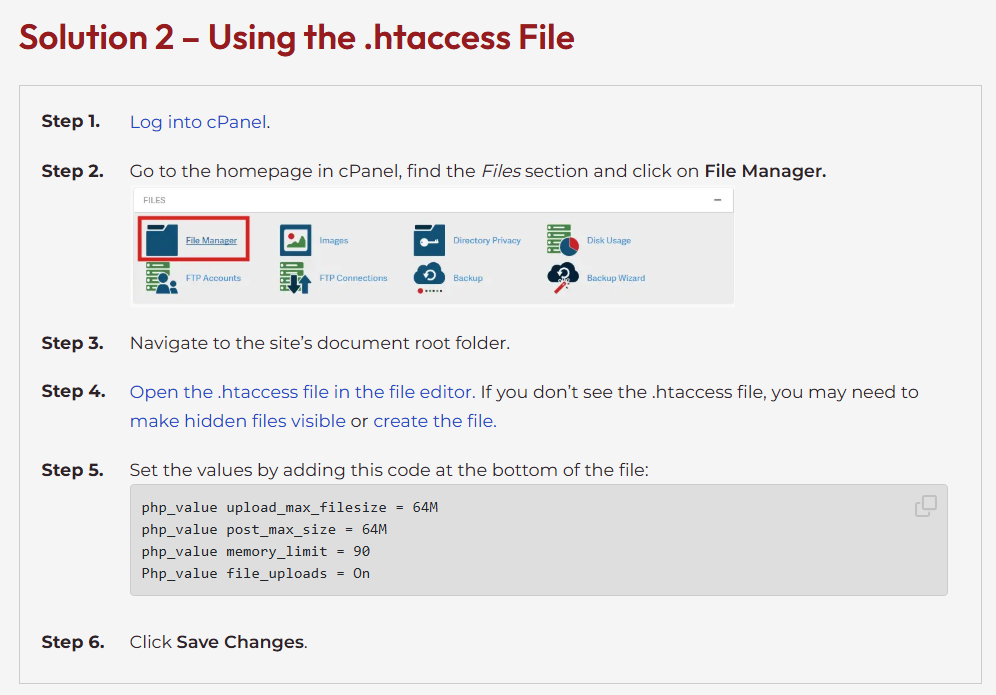
Force all of your pages to use HTTPS. To do this you will need to modify your .htaccess file (or create one if it doesn’t exist)
Using the Code Editor in the file manager, add these lines to the beginning of the .htaccess file
RewriteEngine On
RewriteCond %{HTTPS} off
RewriteRule ^(.*)$ https://%{HTTP_HOST}%{REQUEST_URI} [L,R=301]
Background – I wrote sometime ago about an open source low code project called nubuilder originally started by a Steven Copely – it has been steadily and consistently developed over the years and Steven has since shared development with some other talented individuals. I took another look at it recently to see whether I could find a way of installing and playing about with it on my existing web hosting provider…
and…
If you have a webhost that allows you access to a CPANEL client to configure your hosting environment then it is highly likely that you can set up a nubuilder low code environment. If you have a webhost that allows access to a CPANEL account AND allows you unlimited sub domains and unlimited storage then it is highly likely that you will be able to create a nubuilder low code environment for zero cost!!!
A quick search online found that the following offer CPANEL / unlimited subdomains / unlimited MYSQL
A2Hosting
WebhostingHub (which are a subsidiary of InMotion)
SiteGround
There is usually a limit on the size of an individual MYSQL database but it is so high as to not be an issue.
Configuration Instructions:
This post was adapted from Steven Copleys video which can be found here..
First below I have blanked out my cpanel username variable with either a grey circular box or in code I’ve replaced it with an X. This variable is implemented by CPANEL software to allow resellers to ensure that thousands of users on the same servers do not accidentally duplicate directory and filenames. The username can only be accessed with an additional password but it is not generally available to anyone but the host admin and as such is additional security. It will be used in many of the default settings when creating things like databases and directory names.
Firstly Log into your providers CPANEL

Look to the Domains section and within it there should be a Subdomains icon.

and select the Subdomains icon
Create a new subdomain
Here is the Subdomain field I have typed nbexample – the document root will automatically be completed
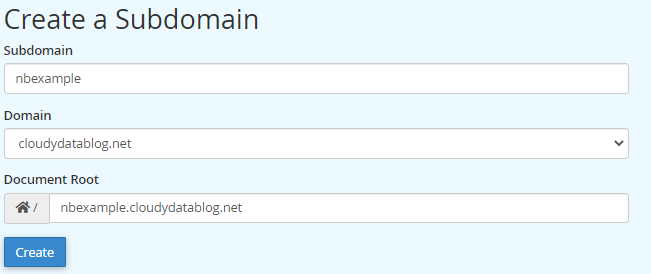
Hit the Create button
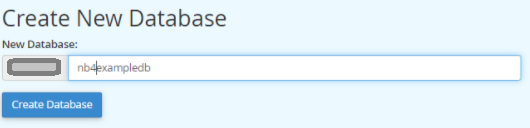
Next we create a database
go to MySQLDatabases within the Databases menu

 Now we create a New User
Here I do the same
username will be X_nb4exampledbuser
password
BlueSkyIsEverywhereToday2020
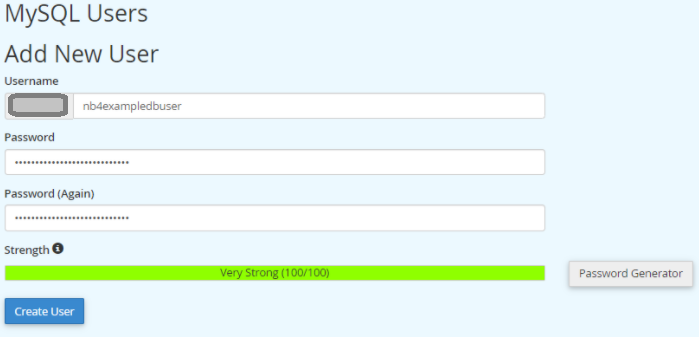
Hit the create user and Go Back and add the user to the database
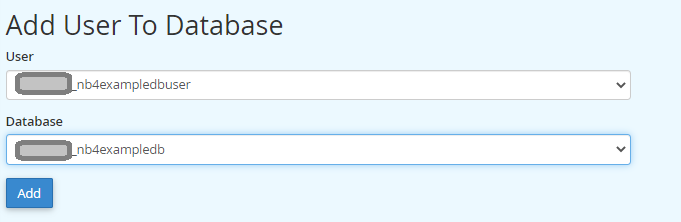
On hitting add you will be asked to select the privileges that the user has over the database just indicate that you would like to allow them all privileges

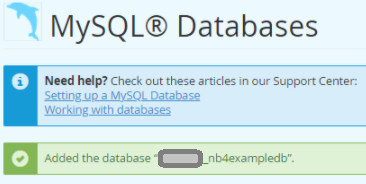
Then hit the make changes button and you can if you want then check the MySQL databases and check that the database exists and that the user is there.
![]()
Next we go to the Nbuilder Github site and download the master file but zipped
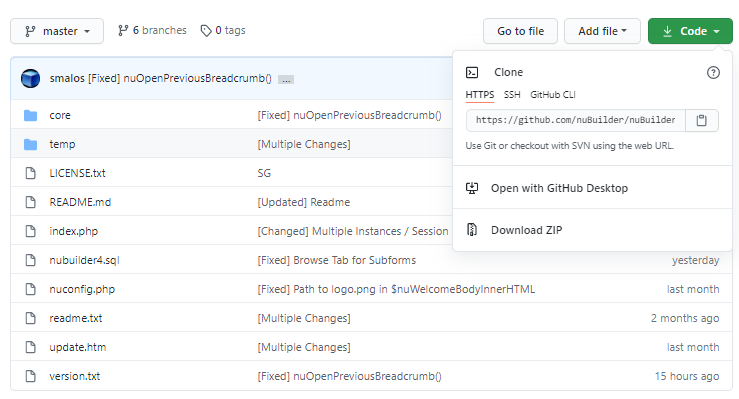
And select the Dowload ZIP option from the Code drop down list.
This will download a master file to your dowload folder – In your browser window in the bottom left you will see the file like this
![]()
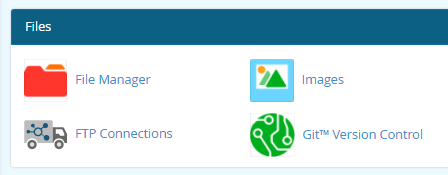
You now need to go back to the main CPANEL hub and look for section marked Files and look for the File Manager option. In my CPANEL it looks it is a red icon.
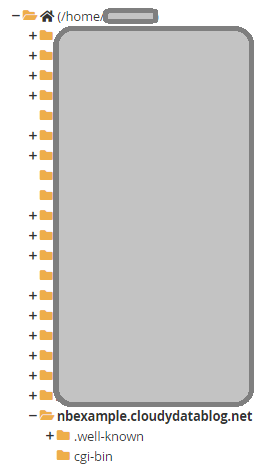
The subdomain will be created as a directory within your root home directory and in my example looks like this. You will be transferring the master zip file into this directory so you want to select it.
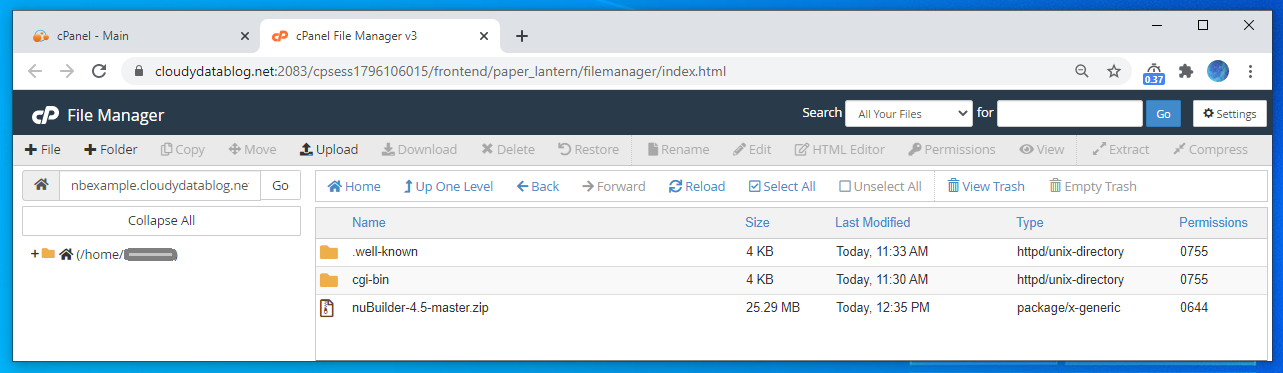
Next hit the Upload button and navigate to find
nubuilder-4.5-master.zip
And load it into your base directory. It should look something like this now
Next you want to extract it..
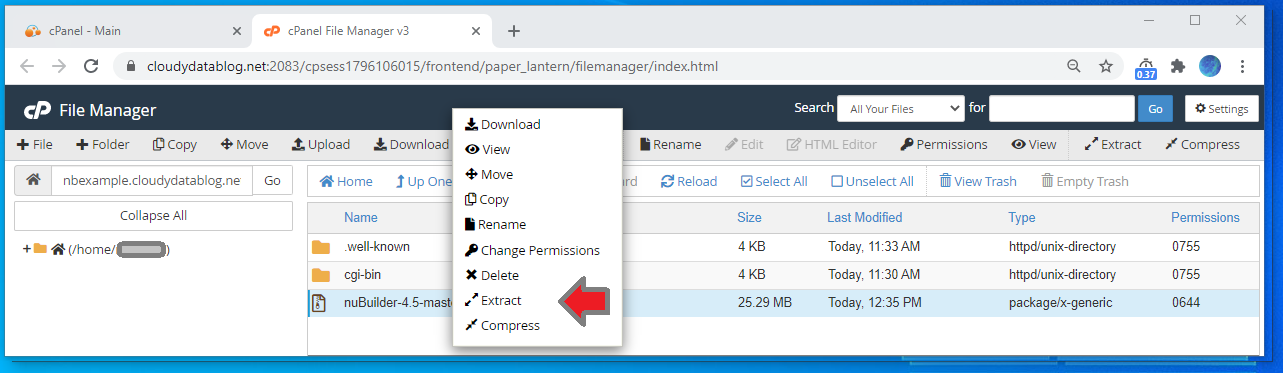
It will then ask where you wish to extract it to
I will normally not put anything in here as it creates its own directory.
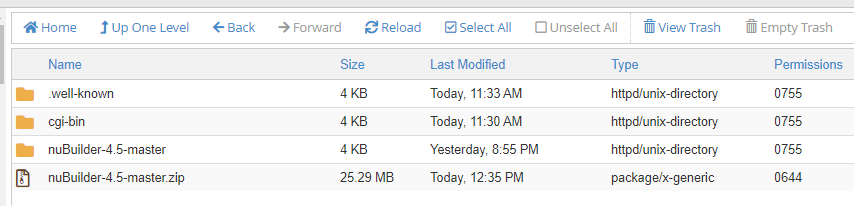
There will be a short delay after which you will be presented with a dialog that shows the outcome of the extraction process.
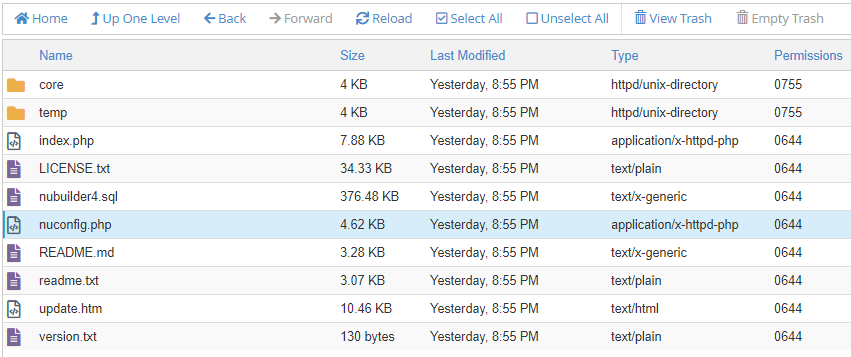
You should now see a new directory in which in my case is called nuBuilder-4.5-master.
I don’t like hypens dots and capitals or special characters in directory names. So
Next we want to go into the nuBuilder45 file and open up the nuconfig.php file.
This is where we will link allow the nubuilder php to link to the created mysql database.
Right mouse click and select edit.
And find the following lines

Now remember from the start our database name / user and password are as follows.

And hit the changes..
Next we want to create a very simple index.php file – alter the path to suit your subdomain / domain and directory where you extracted the nubuilder master file to.
<!DOCTYPE html>
<html>
<body>
<script type="text/javascript">
window.location.replace("https://nbexample.cloudydatablog.net/nubuilder45")
</script>
</body>
</html>
</body>
</html>
It may well look like this
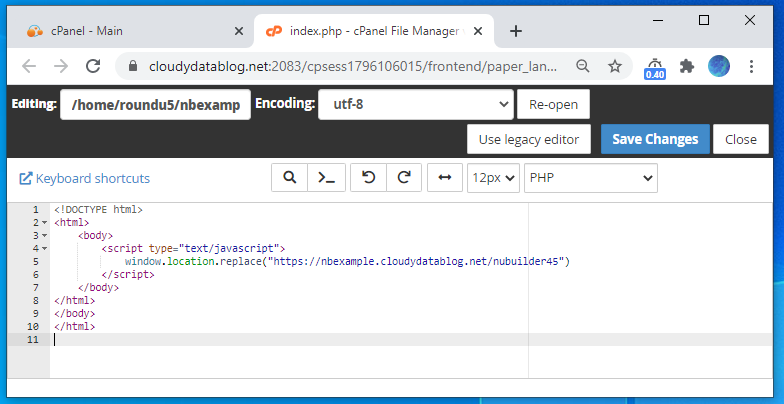
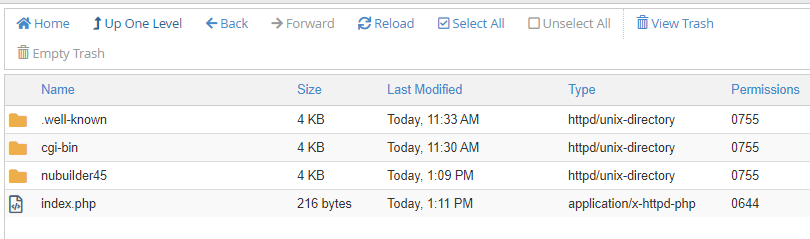
This simple index.php file is placed in the root of the new subdomain you created
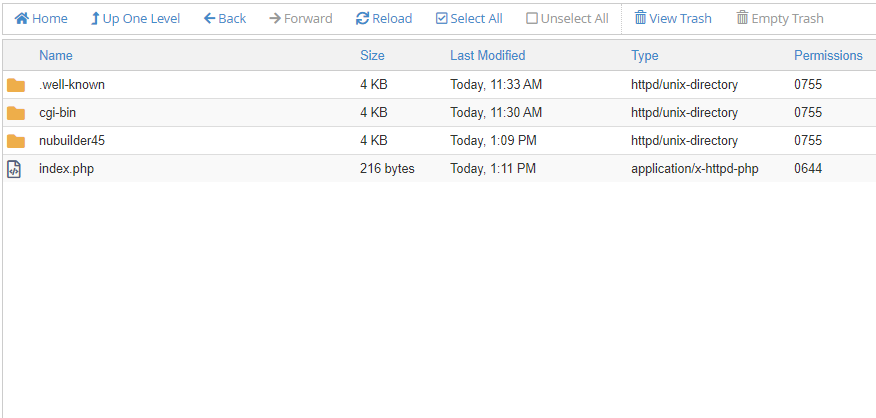
Now you should be able to go to the new subdomain in any browser on the planet and …
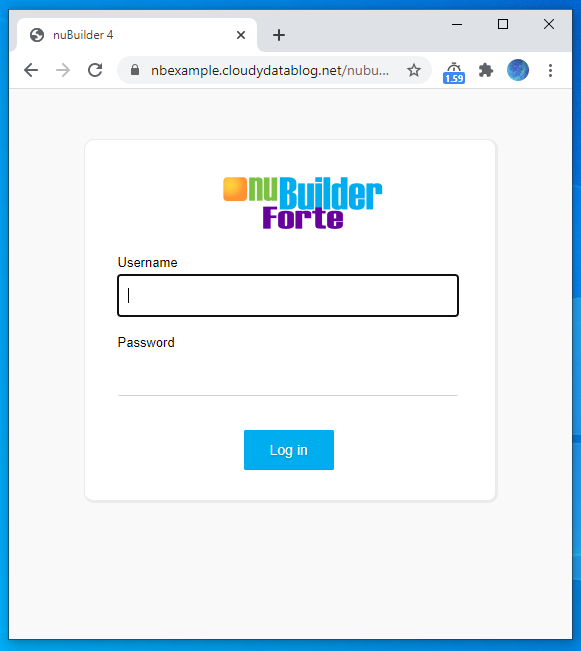
Congratulations you have successfully configured a default instance of nubuilder – your journey to creating low code online databases can now begin..
PS the default credentials are
Username : globeadmin
Password : nu
Please change these immediately in the nuconfig.php file when you get a chance.
For more information on starting to design and develop with nubuilder please follow the link below