I don’t know about you but for me its pretty rare to start an application without any information. At the very least there may be lookup tables or you have information collected in a spreadsheet. Thus when I came to nuBuilderPro one of the first things I researched was how to get information into a table. nuBuilderPro uses a vanilla version of mySQL in the background so this is what we will be working with. We will be attempting to import a csv file. You will need a clean organised csv file.
First create the tables that you require information to go into. Ensure that you have exactly the same table structure as the csv file that you wish to import. Therefore either adjust the table or the csv appropriately. Failure to have the same structure will halt the import.
Next navigate to the administration panel using your particular variation of the below url. Note that it is important to have the / at the end of the url otherwise you will be taken to the more specific database administration page where you design forms. Don’t worry if this happens you can still get to the php administration page by hitting the databases button. In fact this is an alternative way of getting to the screens that I show here.
https://youracount.nubuilder.net/nuadmin/
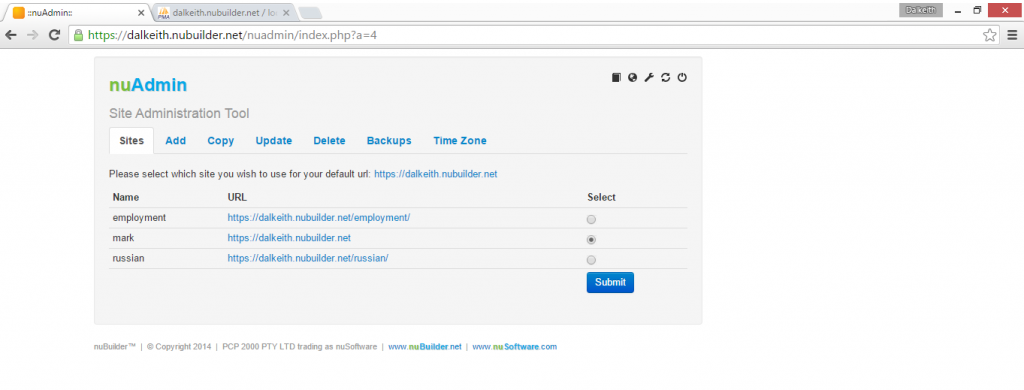
Use your username and password to get into the nuadmin index panel
Once you have entered your username and password appropriately you should be at the following address
https://youraccount.nubuilder.net/nuadmin/index.php
Now select the small spanner sign in the top right – this takes you to the php admin section for your whole VPS there are other ways of going into this web page but we will go this way for now.
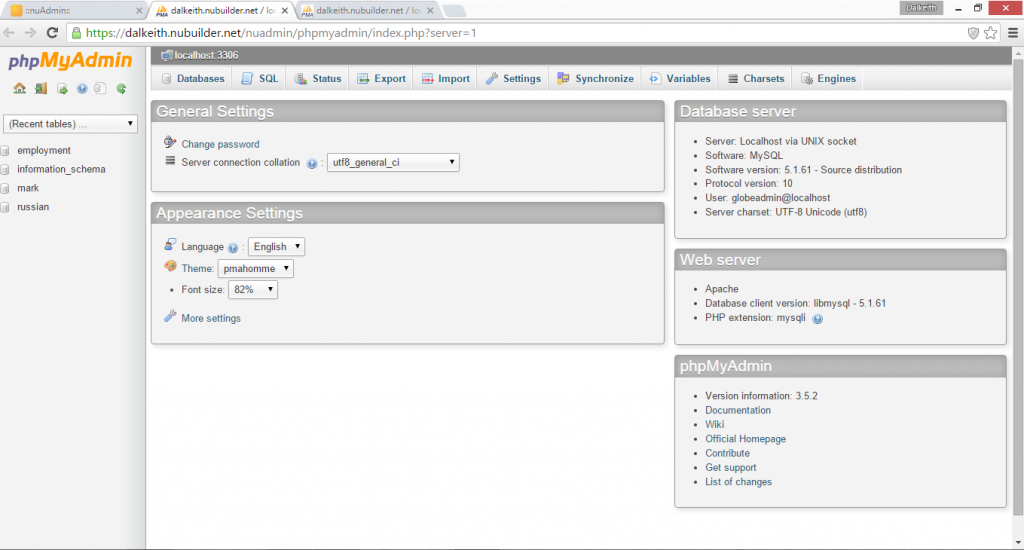
You should be taken to a section which looks as follows
All databases within your VPS should be listed on the left. Each new application will have a database created for it. Each database holds all the required tables that hold your database and are listed on the left hand side. Click on the database in question and then hit structure. You are interested not just in the database but also the particular table. There is a notification grey line at the top of the page which shows you what database and what table you are in.
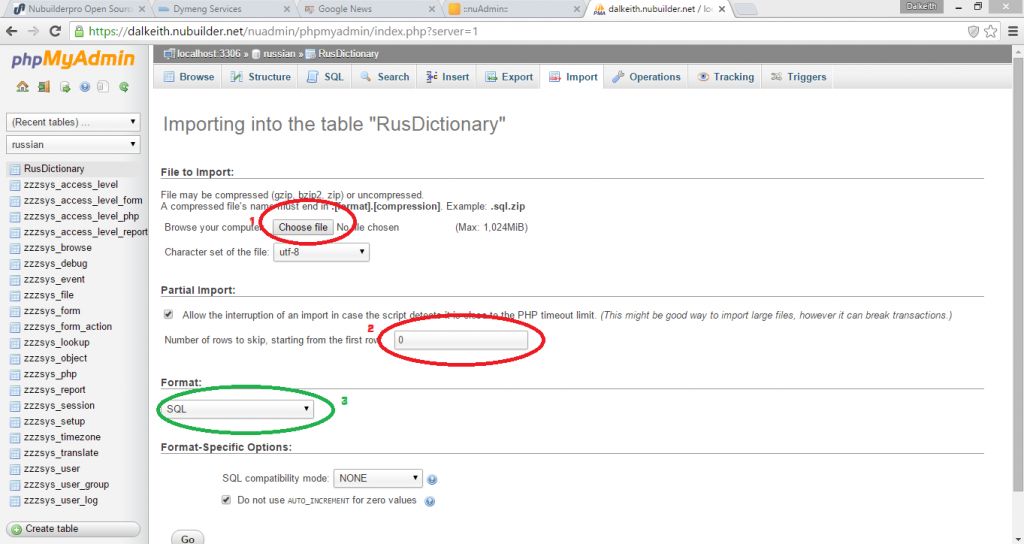
Importing a csv is a straightforward process of hitting the import button at the top selecting the csv file and hitting the go button. If the csv file contains column names you may wish to alter the row at which import starts.
Once import has been completed it will indicate how many lines were imported and how long it took. If there are problems you will obtain a message indicating so. I tried to create a simple Russian / English dictionary and it was really very straightforward. It is important that the csv has the right number of columns as per your designed table.


