Javascript is very powerful and will easily calculate all sorts of interesting things for you dynamically. In PHPRunner I use the popup windows for nearly every table or view form so I wanted it to work with these.
But with PHPRunner we want to store these in the database. I had a devilish time finding a way of referencing the field with which to copy any Javascript value into. After some lengthy discussion with ChatGPT 4 (via Bing) it suggested that I might try and use the CSS Selector.
I then discovered that I couldn’t seem to identify the name of the CSS Selector.
What I discovered is that I could not see a static CSS Selector reference for any of the fields except those that I had altered the formatting on for example changing the font to Roboto Mono.
So first step choose your target field and then alter it using the PHP page designer and then publish.
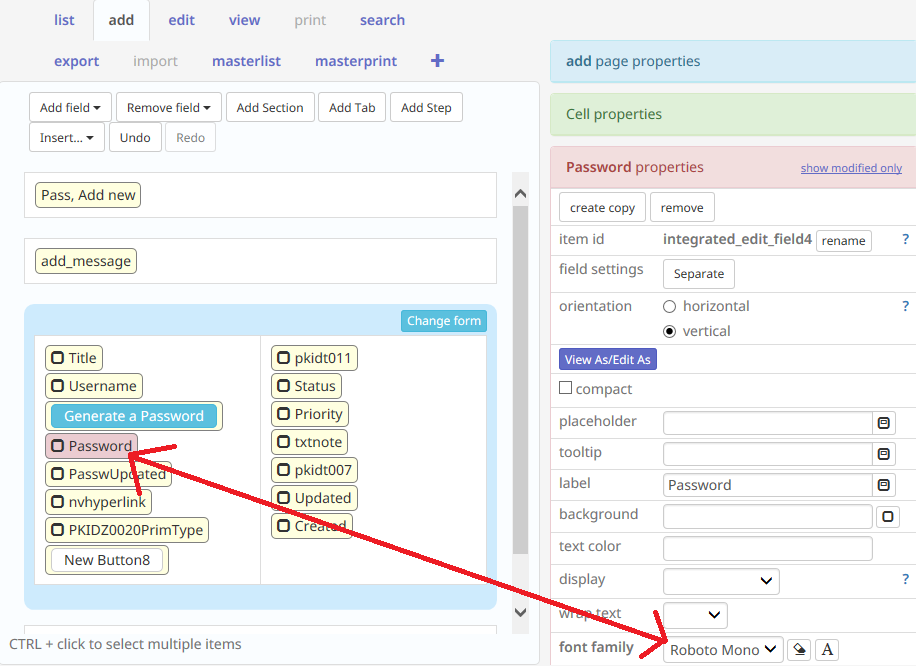
What I discovered was after that I could use the inspect item to identify the CSS Selector
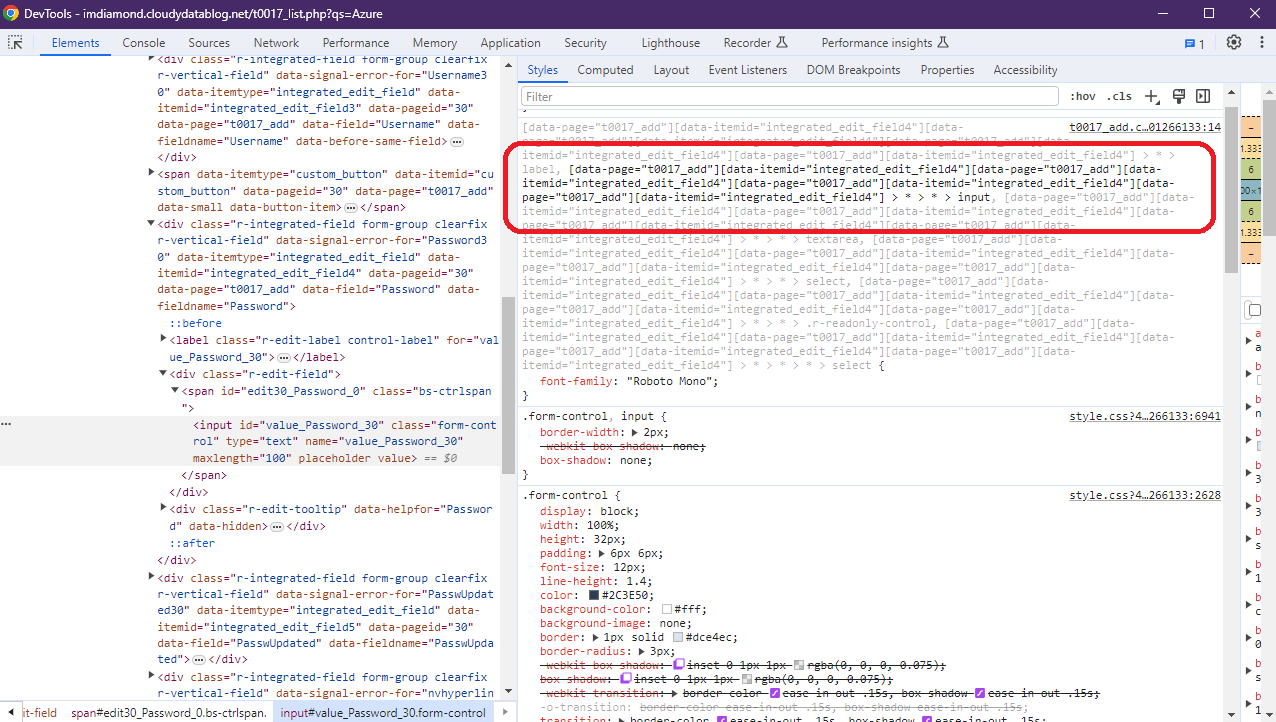
On the published application navigate to the form and the field you wish to target for entry right click and select inspect.
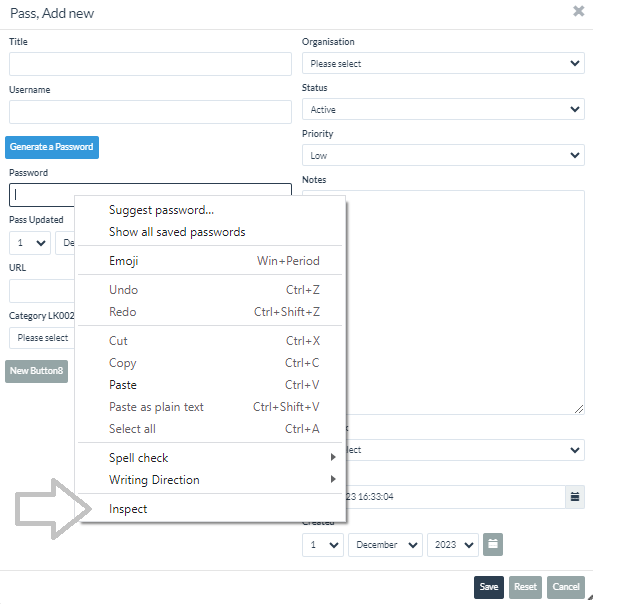
Look to the DevTools window (in chrome and you should see in bold the css names of your field
You can then ask ChatGPT the following
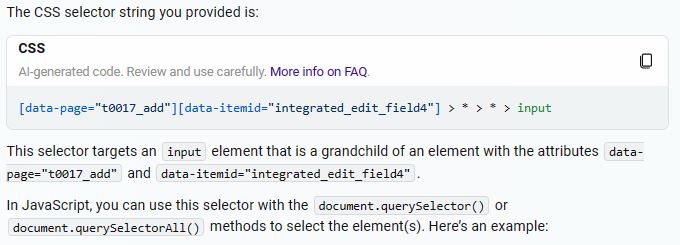
Can you parse the input css selector I need from the following string that can be used by javascipt to be passed a value
[data-page="t0017_add"][data-itemid="integrated_edit_field4"][data-page="t0017_add"][data-itemid="integrated_edit_field4"][data-page="t0017_add"][data-itemid="integrated_edit_field4"][data-page="t0017_add"][data-itemid="integrated_edit_field4"] > * > * > input
An element is a part of a webpage. In XML and HTML, an element may contain a data item or a chunk of text or an image, or perhaps nothing. A typical element includes an opening tag with some attributes, enclosed text content, and a closing tag. Elements and tags are not the same things.
More on elements is available here
This can now be used behind a button and away we go… see below
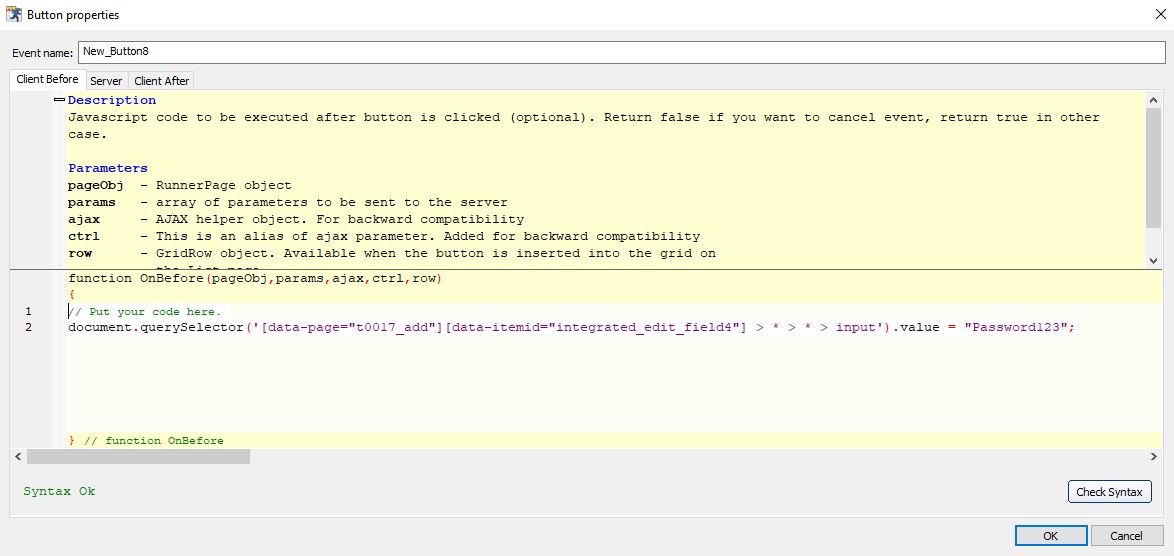
document.querySelector('[data-page="t0017_add"][data-itemid="integrated_edit_field4"] > * > * > input').value = "Password123";
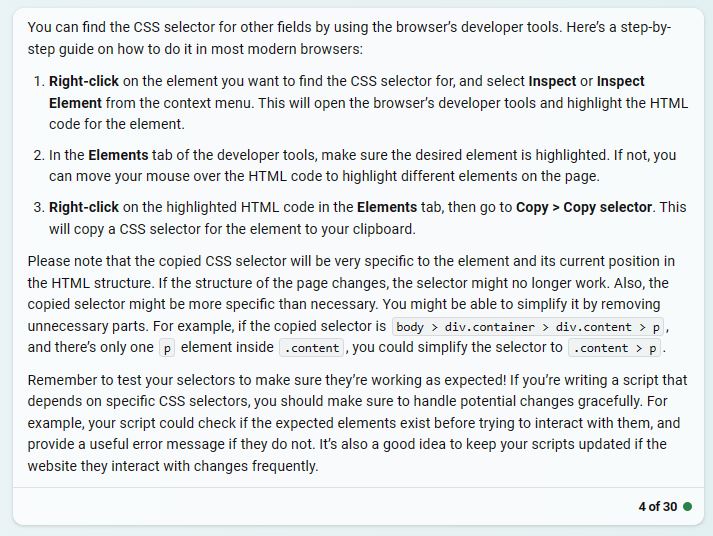
And here are some notes on finding CSS Selectors by ChatGPT4 I am still investigating CSS Selectors there seems to be a black art to understanding their structure and how they can be useful
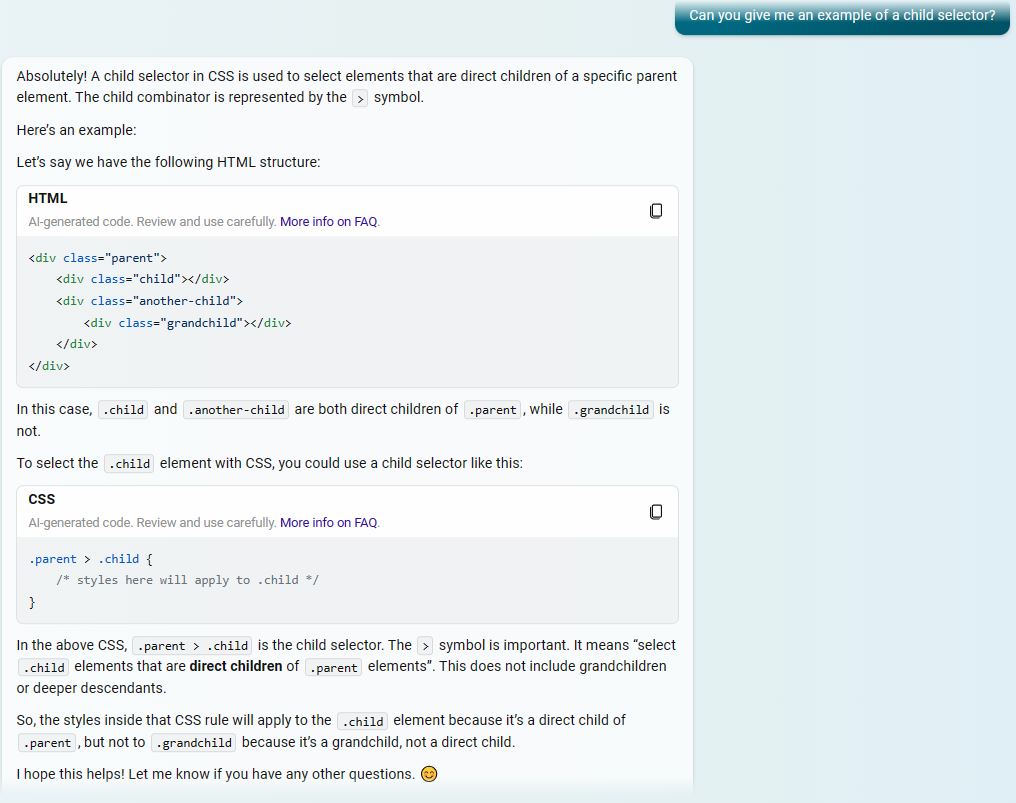
I also asked chatGPT about child selectors in CSS. In my discussions with chatGPT I have discovered that spaces are important and symbols are important in naming and of course Javascript is case sensitive. The dynamic nature of CSS Selectors and their very specific naming conventions combined with spaces potentially being characters really means you need to be on your toes when you use them.