Geoserver Installation (Configuration for SQL Server on Windows)

Once you have your data in an Enterprise Grade database sharing that information becomes important. Some vendors, in particular Digital mapping SAAS vendors want you to transfer your data into their clouds but for a lot of authorities that is categorically impossible for large segments of their data. For example about 3/4 of UK planning authorities run on software built by a company called IDOX Group plc which holds its data in Oracle this cannot be moved. For Geographical data here’s where Geoserver comes in.

Geoserver Official Website

From the website
GeoServer is an open source server for sharing geospatial data.
Designed for interoperability, it publishes data from any major spatial data source using open standards.

GeoServer implements industry standard OGC protocols such as Web Feature Service (WFS), Web Map Service (WMS), and Web Coverage Service (WCS). Additional formats and publication options are available as extensions including Web Processing Service (WPS), and Web Map Tile Service (WMTS).

Another way of putting it Geoserver allows programs that display and manipulate geographic information to display and edit that data while keeping it safe and secure and located in enterprise databases. It can connect to SQL Server / Postgresql and I am told Oracle which are the main relational databases used by Local authorities today so once setup and configured it could be used to compare and contrast information in one location from variable datastores. Datastores that for historical reasons cannot be moved. Here I concentrate on SQL Server because we have a particular issue with new systems needing to connect to SQL Server but it would be great if we could get it working with Oracle as well.

The following are my notes on installation and configuration of Geoserver on Windows linking to SQL Server and in this case a remote(not on the same computer) SQL Azure instance I believe any remote SQL Server instance would be similar. This post is a detailed explanation of the installation of Geoserver locally on a laptop but I believe installation would be exactly the same on a Windows Server machine albeit additional steps would be required to publish to the web either internally or externally.

Its all configuration so remember your host names / IP numbers / ports / usernames / passwords / database, table and column names

To start this tutorial please ensure the following resources are available;

  • SSMS – installation of Sql Server Management Studio
  • SQL Azure instance with privileges to run SQL. Please note you will need to know the port number of your SQL server instance and have a Username and Password for your user.
  • Necessary privileges to set the firewall on the database which you will link to Geoserver –
  • QGIS – installation – If you don’t have a SQL Server instance with geodatabase already that you can use you will probably need this to add at least one record to a geometry enabled table I plan to expand my notes on this but at present you might be able to skip this
  • Geoserver 2.24.1 – installation files
  • Enough privileges on the computer you are installing geoserver to download installation files and move files into a library subdirectory of the c:/program file/geoserver directory
  • WorkFlow Synopsis Overview
    1)Download and install Java runtime engine (as above importantly here I use 11)
    2)Download and install Geoserver (2.24.1 in this case)
    3)Test that the Geoserver Admin dashboard is up and working
    4)Download and configure Geoserver Extension for SQL Server library (SQL Azure example)
    5)Good idea to setup a login specifically to your SQL Azure instance with least privilege – Your SQL Server instance with geodatabases may already have suitable logins. So steps 5 and 6 can be skipped
    6)Good idea to create an example table with Geodatabase in SQL Azure – will be used as a test connection table – NOTE if you already have a SQL Server with geodatabases you could use that instead.
    7)White list IP within the SQL Azure instance firewall rules to Geoserver computer
    8)Opening Geoserver and setting the ‘Store’ to reference your SQL Azure database using the login setup in step 5.
    9)Adding a new layer from the Store made in point 8 and seeing if you can Preview the layer – Ideally you should have a table that has some features in it. Setting the WMS and WFS up in Geoserver with sufficient rights to allow editing (if WFS setup)
    10)I don’t explain it in my post below but the next step would be to test in QGIS to see if you can setup a project in QGIS which can pull from Geoserver against a basemap and you check that the Polygons are actually where you want them to be.

    Workflow Detailed
    1)Download the install Java Runtime via JDK

    There are some complications here
    Initially I tried to use the Java Runtime engine 17 and went through the complete Geoserver installation but on testing I was getting a Java error when trying to view layers. After a short google I came across a stack overflow thread that indicated that geoserver support for JDE 17 was experimental and I should use Java Runtime engine 11. Deinstallation of 17 and installation of 11 solved this.

    Additionally there is the issue of where you obtain the Java Runtime installation from – there is the Adoptium location and then there is Oracle location. Oracle are making moves to charge for use of their Java Runtime engine so it is important that you use Adoptium resource to reduce costs.

    Later I will list the url to the JDK download for Java Runtime engine but it is important to realise that Adoptium is a safe source, well supported and noted as open source.

    https://adoptium.net/en-GB/members/

    so

    Google Search for Adoptium
    https://adoptium.net/en-GB/

    Navigate to other platforms and versions and target windows 64 bit JDK and 11 LTS version and download the .msi.

    After a short delay you will be shown the msi which will be in your downloads folder

    Double click on it to install.

    Now the only thing that is tricky here is to setup the java home directory as follows

    Video Installing Adoptium JDK on Windows

    In particular note this section

    2) Download and install Geoserver

    Go to the official Geoserver web page and follow the links to download the windows installer

    Here I use the windows version of Geoserver version 2.41.1 obtained January 2024 from the following url
    Geoserver Official Website

    See download button and then go to Windows Installer

    I chose the left option and then I chose the Windows Installer option

    This will download Geoserver-2.24.1-winsetup.exe to your download directory and you can then start the geoserver installation process

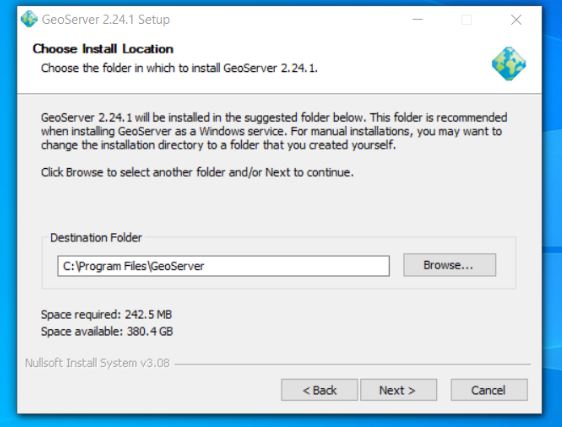
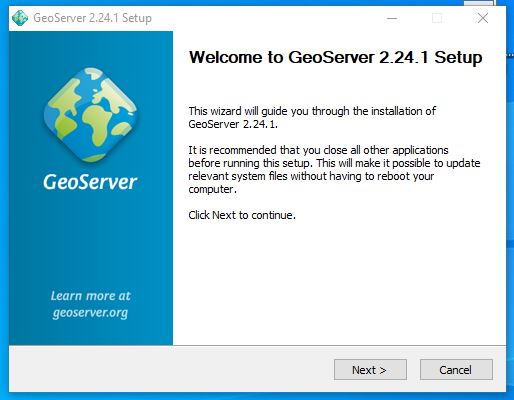
    Next open up the executable and follow the instructions
    Next agree the licence

    Next we reference the java library installed in the previous step – if you have set the java_home variable correctly it should automatically find JRE 11 for you and it will place it within the path reference below. I don’t have a screenshot of the JRE 11 reference here as on my first installation I referenced the Oracle 17 JRE – (note I went back de-installed geoserver installed JRE 11 and then reinstalled geoserver to counter the proprietary Oracle runtime library and importantly to fix the issue that I was facing of geoserver not being compatible with JRE 17

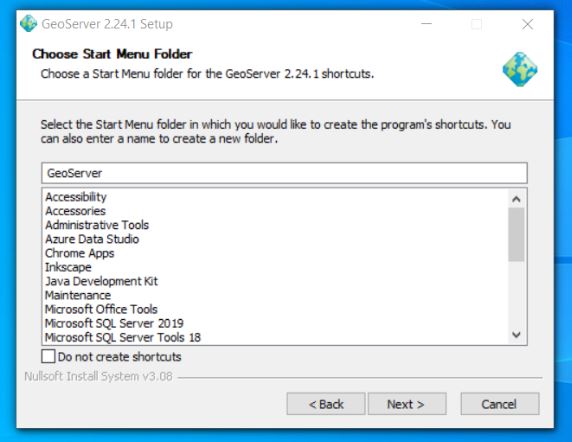
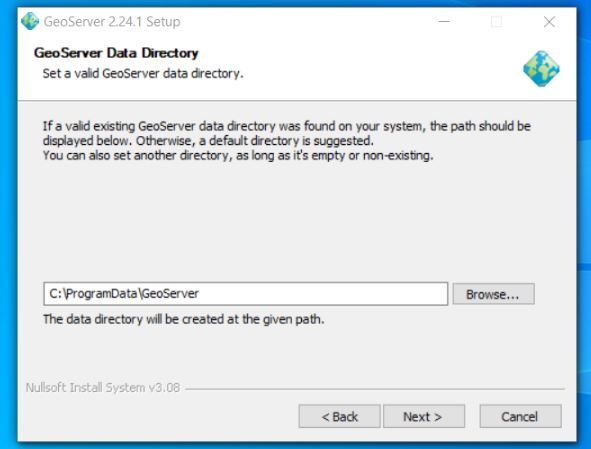
    The rest of the install from here is standard for a windows install

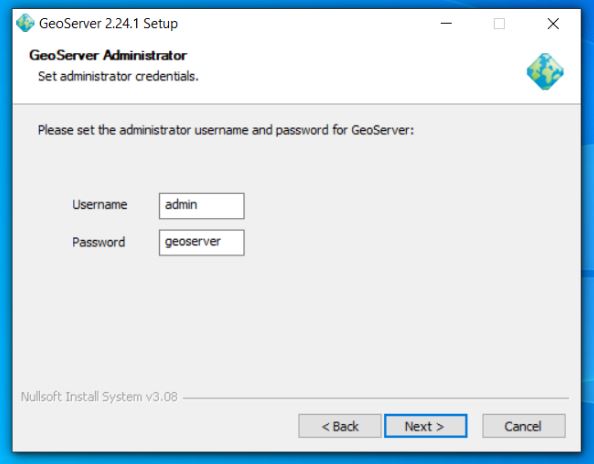
    Next setup the default admin password – defaults are admin / geoserver
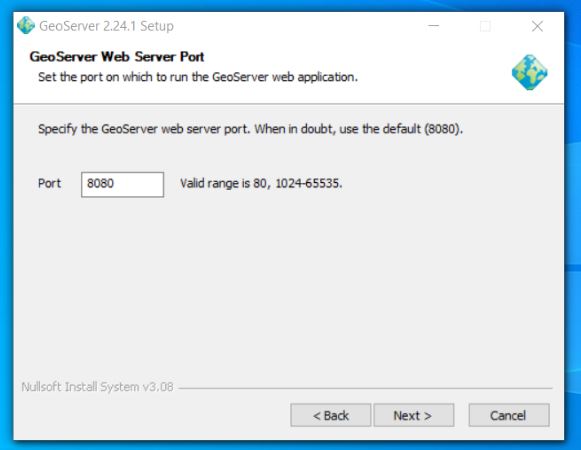
    Set up port geoserver runs on – default is 8080
    Next choose the execution type I like to install geoserver as a service
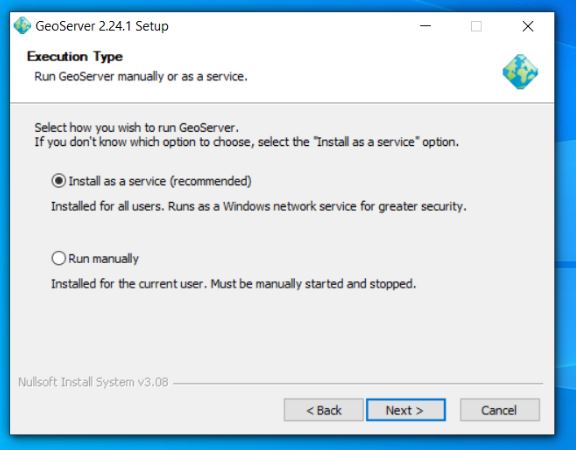
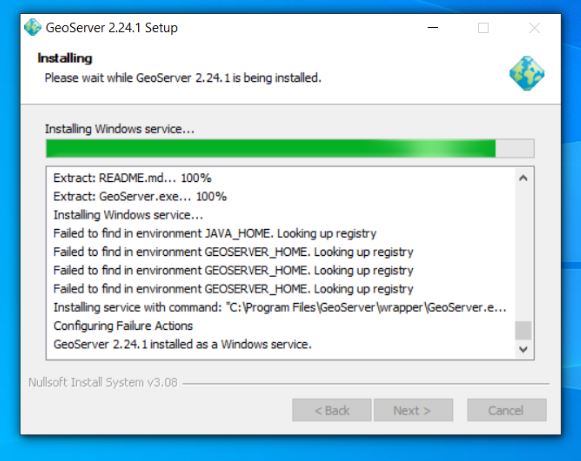
    Confirm your preferences and then trigger install
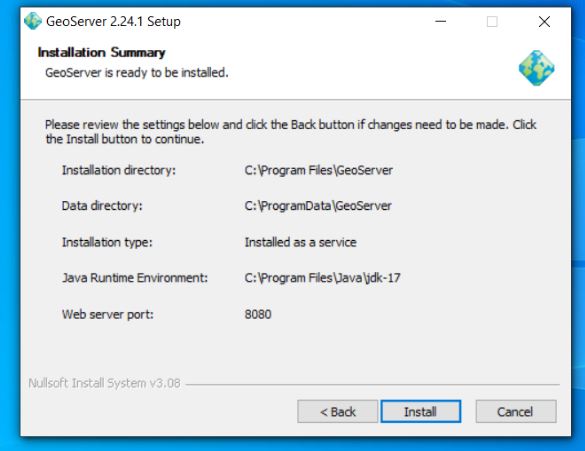
    Now you should see geoserver on your local machine as a service which you will need to ensure is running to access properly

    3) Test that Geoserver Admin dashboard is up and working at least locally

    If you have used the same settings as me open a browser and navigate to the following url

    https://localhost:8080/geoserver/web

    Login with the username and password which is usually admin / geoserver
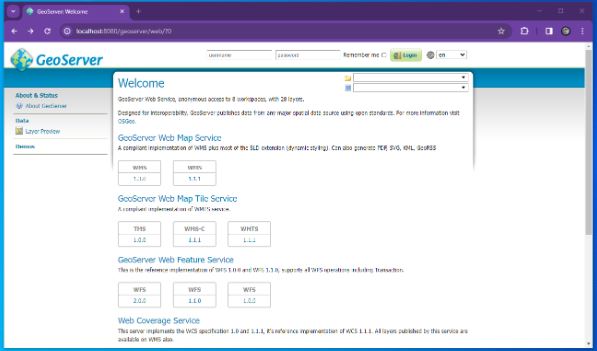
    At which point you should see something similar to the following
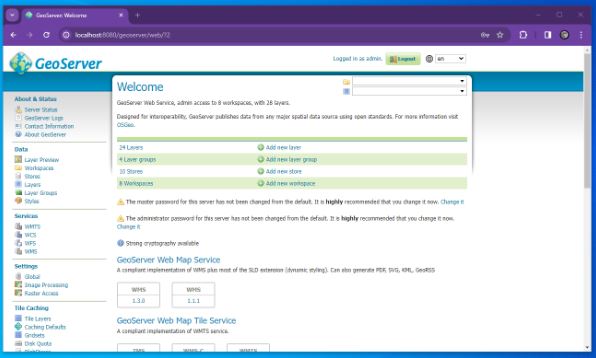
    4) Download and configure Geoserver Extension for SQL Server

    At install Geoserver comes with the ability to connect to Postgres but NOT SQL Server so we must install/configure plugin extension to enable Geoserver SQL Server connections.

    Here we go back to the geoserver.org website and go to download but this time instead of choosing the windows installer we look to the Extensions section and choose SQL Server

    This should download geoserver-sqlserver extension plugin
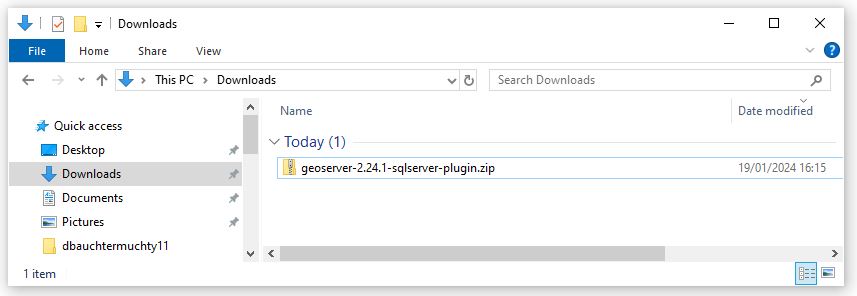
    Next copy all files with the jar suffix into the following directory

    C/program files/GeoServer/webapps/geoserver/WEb-Inf/Lib

    Next restart the geoserver and go back to the local host and sign in

    http://localhost:8080/geoserver/web/?0

    We are now very close to linking to SQL Server prior to that we must whitelist our geoserver so that your SQL Server instances will accept connections from your geoserver. Steps 5 and 6 are more about creating a user and ensuring you have a geodatabase with a georeferenced table skip to 7 if you want to read about white listing in SQL Azure or you have an alternative database that you could use with requirements already set up.

    5) Next its a good idea to create a user with least privilege this will be used to set up the link so go to SSMS

    Least privilege User Login Setup SQL Server

    Here allow the amount of access you wish users to have remembering the principles of least privilege

    6) Lets create an example table with geometry that we will be connecting
    When I first tried connecting to SQL Server (SQL Azure in my case) I didn’t have any georeferenced tables so I created one and added a few records. If you have a database already with tables with geometry or geography you might not need to do this step.

    So open SSMS and navigate to your database and use the following TSQL to create a table here I call it t064

    SET ANSI_NULLS ON
    GO
    
    SET QUOTED_IDENTIFIER ON
    GO
    
    CREATE TABLE [dbo].[t064](
    [PKID] [int] IDENTITY(1,1) NOT NULL,
    [geomcol] [geometry] NULL,
    [sitename] [varchar](30) NULL,
    PRIMARY KEY CLUSTERED
    (
    [PKID] ASC
    )WITH (STATISTICS_NORECOMPUTE = OFF, IGNORE_DUP_KEY = OFF, OPTIMIZE_FOR_SEQUENTIAL_KEY = OFF) ON [PRIMARY]
    ) ON [PRIMARY] TEXTIMAGE_ON [PRIMARY]
    GO

    This is a really simple table with three columns and you might want to link to it through QGIS and just create a few records – I would try and use a default projection of 27700 if you are UK based. I might come back with an example table with records..

    If you want to link to this table for testing then you should try and input at least one record here. I added records using QGIS and I hope to come back to this post and update it to be more specific

    7) White List the IP within your SQL Server or SQL Azure instance.
    Setting IP White List in SQL Azure

    8) Opening Geoserver and setting the ‘Store’ to reference your SQL Azure database using the login setup in step 5

    Navigate to the local host url for Geoserver namely

    http://localhost:8080/geoserver/web/?0

    Go to store and then you should see the following page
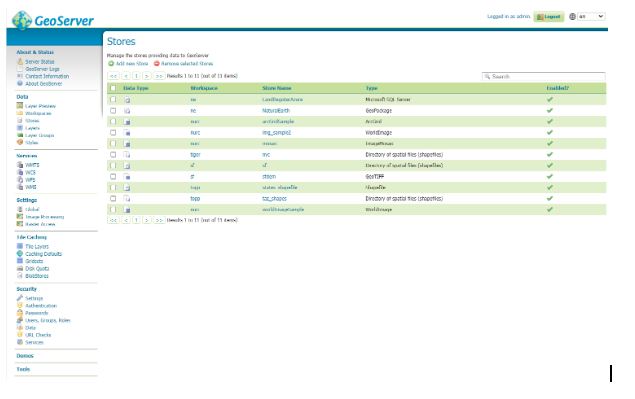
    Hit the Add New Store green plus button in the top left corner you will be presented with the following screen
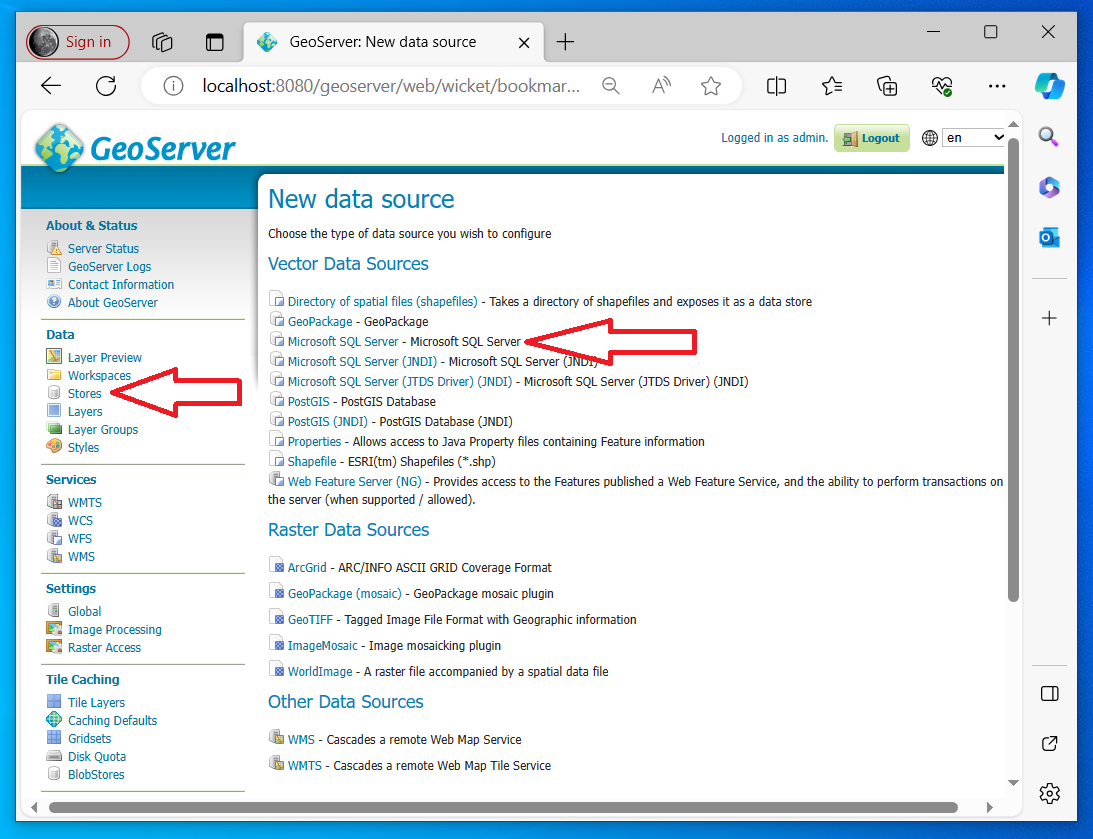
    Fill out as many details as you can
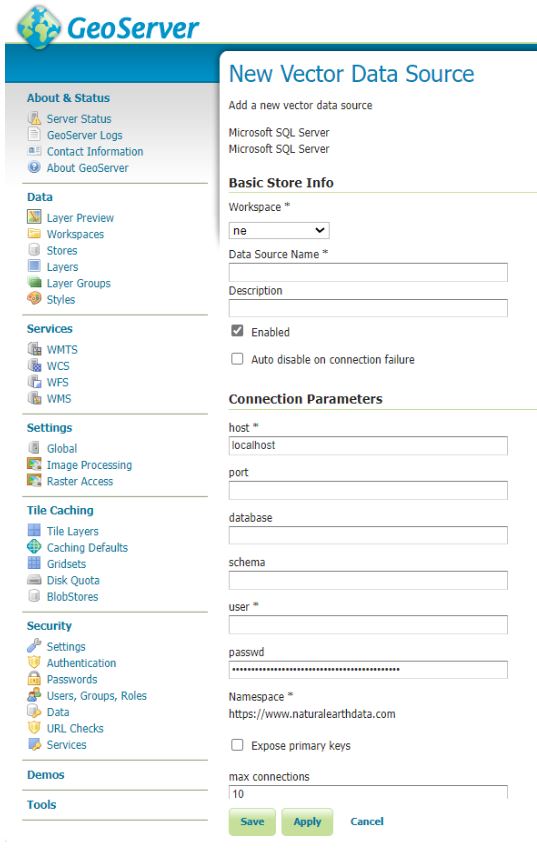
    For SQL Azure this is likely to be similar to the following

    Host = namevariable.database.windows.net (normally unique to instance in SQL Azure)
    Port = 1433 (sql azure default)
    Schema = dbo (sql azure default is dbo but your database maybe bespoke)
    User = uservariable (remember least privilege is a good idea)
    Passwd = passwordvariable (should be unique to your database)
    

    Save and Apply and then your new connection should appear in your store

    Here’s an example…. (see top line)
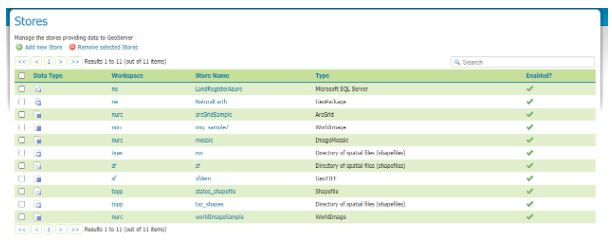
    For the purposes of this tutorial I setup a login with db_owner rights to the database LandRegisterAzure your mileage will vary.

    9) Next we add the layer which references the SQL Server

    Select Layers within the Data section of the menu (usually to the left of the geoserver dashboard) then hit Add a new layer
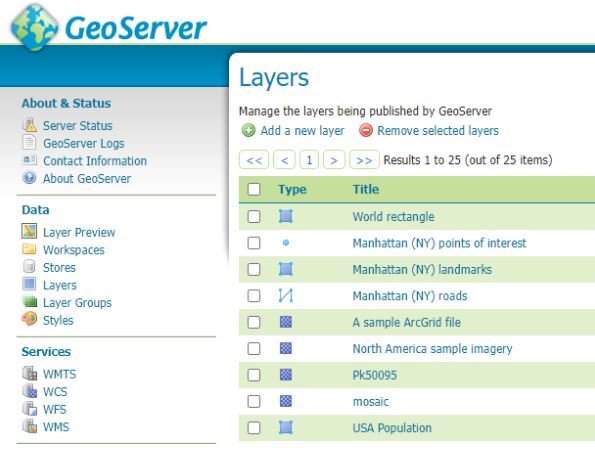
    You should get the following windows
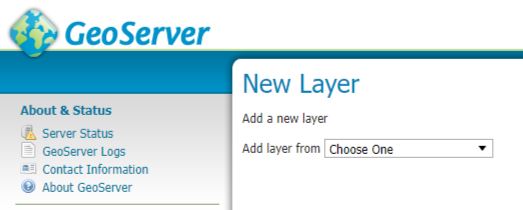
    From the drop down select the store which references your SQL server. This will reveal all the tables and views in the database and you scroll through them to the table or view you wish to publish and in the column marked Action will be publish you can hit the Publish highlighted text (I’ve done that here already so under Action our table is marked as Publish again and there is a tick in the column titled Published.

    We can now quickly test to see if things look like they are working by going to Layer Preview.

    Look to the left hand side and select Layer Preview

    Scroll down through the list and identify the layer that you have just added. I now select the open layers option

    A new browser tab will open and if you have successfully configured the SQL Server you should be presented with your layer – without any background
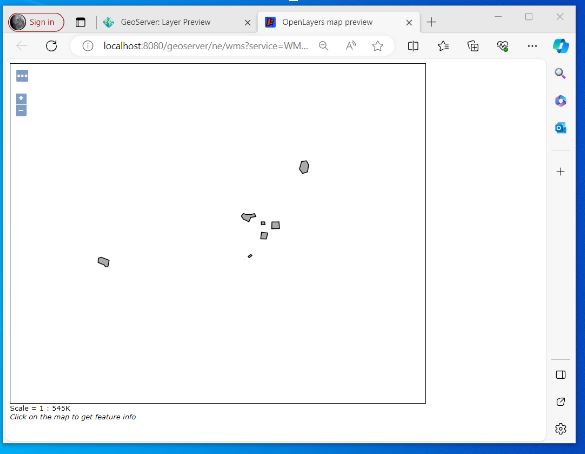
    10) I don’t go into it here but next I will try and write up my notes on QGIS and Geoserver setup – On my laptop I managed to set up a WFS to my SQL Azure instance through Geoserver where the layer was added to a project and I was able to edit information in my SQL Azure database through QGIS and were displayed correctly against a basemap in the right place!!

    –/END/–

    New System Assessment : A Simple Set of Guidelines for judging material differences between Software

    Here’s a short guide I put together for myself to help me assess the value of enterprise systems that I may be looking for or designing myself. Not hard and fast and some points may not be relevant to every application but this should form a good basis from which to start. Generally a higher number is better than a lower number but within numbers items are more cumulative and of equal value.

    1)Paper based = Everything from single sheets to formal Books of Accounts
    2)Simple Digital = spreadsheet and other file based storage
    3)Cloud based Simple Digital = spreadsheet and other file based storage – this can include file based blob storage
    4.1)LAN relational database – normalised but otherwise fairly locked down
    4.2)LAN relational database + easy import and export of data other than spatial
    4.3)LAN relational database + report writer definable by users
    4.4)LAN relational database + spatially enabled
    5.1)Internet available relational database – normalised but otherwise fairly locked down
    5.2)Internet available relational database + easy import and export of data other than spatial
    5.3)Internet available relational database + report writer definable by users
    5.4)Internet available relational database + spatially enabled (noted not all applications require a spatial aspect)
    5.5)Internet available relational database + separate site available for public access view only
    5.6)Internet available relations database + separate access to public access to edit and add information

    Requirements
    + UPtime / reliability
    + SPEED – after reliability very important
    + Good master details forms (sounds easy but bootstrap is not great for this)
    + GOOD Search – the larger the system the more important the search options are in it. Look out for things like Automated Objective Index creation (case sensitive search is more of a hassle than a benefit a lot of the time – odd wild cards – or not being wild by default are problem areas)

    Important Points
    + Portability can you up sticks and move it to a different cloud provider
    + Non – Proprietary (Can be a gotcha if its really obscure or has weird security, often linked to portability)
    + two factor authentication
    + Responsive Design (Not necessarily as important as you think in some applications see Github / Open Layers arguably don’t need it)
    + Dynamic saving – I really miss the fast dynamic saving environment of MS Access the save button isn’t quite the same
    + Built in CRM – I generally like them especially if data can go straight into correct files.. Increasingly I am designing systems with inbuilt CRM – I know this might not be to every organisations taste but it is jarring to go between systems and normalisation between systems is usually very sub optimal – plus you frequently come across proof of negative problems when data required for a specific task is not held appropriately.
    + Satellite application for customers to enter information (why not let your customers maintain their information can be great and can empower customers Fintech anyone?)

    = All the bells and whistles
    Spatially enabled internet available database with two factor authentication – report writer and easy import and export of spatial and attribute information with public access to edit and add information by customers (Possibly via satellite application).

    Extraction Transformation and Load (ETL) – some thoughts on a large IT transfer project

    In 2017 I was involved in an important work project to transfer all the records in a legacy system that was being deprecated by the vendor (IDOX Group) into another maintained system. We were in some ways fortunate because both systems had been designed by a single company (IDOX) and they were encouraging us to transfer. We had delayed transfer for several years already but were aware that we now had to move. The vendor did have some tools in place , had staff dedicated to such transfers and were offering favourable consultancy rates. The amount of data was not horrendous in computing terms but they were far far beyond the remit of the ability to cope with any sort of manual data correction and the system was an absolute core system upon which several departments completely depended. These were systems that all departments are in from the moment they start the work day to the end. Generally its unusual if they are down for more than 5 minutes in a month, all work pretty much stops when they stop and in no circumstances could they be down for more than a day without special dispensation and coordination to indicate to manage customer expectations.

    The whole project was a success although it was challenging. Here is an outline of the steps we took. As ever order here is important in most of the steps. I had written something on this before but consider this to be a more accurate rundown see here

    Step 1
    Inform managers of all involved sections and ensure they are on board – identify and ring fence budget

    Step 2
    Appoint project manager on vendor and client side
    draw together team to perform transformation.

    Step 3
    Draft time table creation of how long it will take putting in place planning for tutorials on systems and consultancy.

    Step 4
    Request managers to put forward staff on all sides willing to be involved

    Step 5
    Identify any omissions in knowledge and start to identify how this can be remedied. Kick off and complete acquisition of said staff.

    Step 6
    Meeting with lead staff to confirm buy in. Request buy in from staff including ring fencing of holidays etc.. to ensure key staff are available at required times.

    Step 7
    Set up test systems that all individuals have access to and ensure that the old and new systems can be viewed simultaneously by individuals. Ensure that the domain specialists can identify processes that will be mirrored from the old system to the new system

    Step 8
    Give DBAs or those that will be doing data transfer access to databases of source so that they can start thinking of how they can pull out information.

    Step 9
    Training for all individuals concerned in new systems.

    Step 10
    In new system start tasking individuals with how they are going to do the simple processes – eg register a record approve a record alter a record and get reports out. If possible allow new champions to start to define things like reports.

    Step 11
    Start making up any new lookup fields compared with old lookups and also start tasking individuals with creation of reports and letter that will need to be done.

    Step 12
    Start mapping the data from old system to new system – excel spreadsheets can be used for this that show the data going from the old system and what fields they are going to go into in the new system. Divide this task up between domain users – this step needs to be done after old and new systems are on domain users machines. As part of this the applications in question should expose if possible the table and field names of the source and target fields. With the systems we were involved in this was possible both for the old and new systems.

    For each form on the two systems try to identify the below

    Source table.field Target table.field

    Also get them to map the lookup table values if direct transfer is not possible or if alias id are used in these lookups.

    Source table.field.value=Equivalent.Target table.field.value

    Step 13
    Give both mapping documents to the ETL people to allow them to start writing the queries. It is unlikely that there will be a straight transfer across from table to table. While it would be expected that field and table names will be completely different it will be expected that table structure will in certain places be different in this respect it would be good to have a really nice schema diagram of both source and target.

    Step 14
    Allow data individuals to write scripts that can be run live against present initial system – if necessary doesn’t need to be live live could copy every night and then perform on 1 day old database backend – which is what we did. This means work can go on in old system and then at a touch of a button.

    Encourage DBAs to be able to run these scripts every day to ensure that running them for go live is absolutely no issue. Our scripts only took about half an hour to run so this wasn’t an issue. I was personally involved in writing the SQL for those and I had systems in place to cross tab the amount coming into each new table so I could see new records and information from the old system trickling manually into the system and then being transferred.

    Step 15
    Test data input into new system

    Step 16
    Check test data input into new system with reference to domain users.

    Step 17
    Confirm go live date ensure staff available for issues

    Step 18
    Go live to production and start all new procedures ensure staff technical and domain key players on hand to make flexible solutions to things

    Step 19
    Project review on going maintenance and improvement of new system

    Step 20
    After suitable time turn off of old system if possible.

    Appropriate User Interfaces

    I have three guitars 10 windsurfers and 4 bikes (5 if you count a static exercise bike) I have three regularly used computers (tablet , desktop and laptop) – four if you count my phone. My bikes are not duplicates one is for racing, one is for training, one is for commuting and the final one for mountain biking. I often use my commuting bike instead of my car. I try my hand at DIY and have got to the point of building a cupboard containing drawers only for tools I have so many tools I cannot list them all from memory.

    I get the impression that companies are pushing for all applications to be pushed to the web. Fine but if you have invested in an amazing building with an amazing Local Area Network why push absolutely everything to the web? Milk your assets often the longer you leave it the more stable the web environment will be – it still continues to experience massive change. Web has its advantages but flexible cheap very rich User Interface design doesn’t seem to be it. The benefit of database driven applications today is that the backend is totally independent of the User Interface. Developing an internal local area based UI can be totally independent of building a web based user interface.

    Carefully consider and don’t be afraid to use the full range of tools available to you get the backend right and then work on a very very usable front end. Users want quick usable design that fit their needs they really don’t care about the technology.

    Project Management – Things that help lead to successful outcomes

    Update its interesting to compare this post with a post I made later on the same subject..

    Extraction Transformation and Load some thoughts on a large IT transfer project

    FinishLine

    Many roles within organisations now require good project management skills especially when it comes to implementing new IT systems and applications. But are there things that can be put in place at the beginning to improve your chance of success. I would say yes and if I am involved in a project my personal guidelines are as follows;

    Step 1 : Get Stuck In
    The benefit of computers is that manipulated electrons are essentially free and immortal. Try to rearrange a few. If you aren’t getting anywhere wipe them and then re-arrange them some more. Even if you are not successful you are successful in knowing that one particular arrangement cannot be achieved. You are creating a machine just like children do with Lego or engineers create with bricks and mortar except your bricks can immediately be removed and copied infinitely and each additional brick often costs nothing. In most organisations you will quickly come up against configuration and security problems. Configuration and security problems come out of nowhere often and can be project killers best to know about them up front.

    Step 2 : Know your Technology
    If you don’t know it at the beginning you better hope you know it at the end – go to step 1 if you are struggling with step 2 – That’s recursion for you.

    Step 3 : Increment often , test constantly and try to keep focused
    Set short deadlines and try to regularly meet with colleagues or clients to show progress – can be frustrating if colleagues or clients start going off on tangents especially in meetings so try to keep focused on the remit.

    Step 4 : Know the Process
    To date I haven’t been asked to design any systems that I have had particular difficulty in understanding the process. Undoubtedly I think this would be different if I was trying to create an application for geology exploration or for instance mapping or maybe translation. The mathematics behind those kind of applications are complicated. Most business processes tend to be remarkably simple and the simple act of normalizing the data is usually enough for me to get to grips on how the system will be used.

    Step 5 : Build in redundancy
    Properly normalize your data build in extra fields if you want even if they are not used – for example collecting information on individuals I always add a field for date of birth even if its not spec’d invariably someone comes along and says actually it would be useful to know what age our customers are.

    Step 6 : Have privileges
    There’s nothing that will slow down a project quicker if you have to hand over responsibility of tasks to uninterested individuals who are not part of the project team. Better to have those people in the team and make sure they are on board with the importance of following through with the project.

    Good luck and happy hunting

    Guidelines for E-mails

    Not the most exciting of subjects but everyone is involved in communication whether its sorting out lunch with a friend through to organising massive engineering projects. Confusion and misinformation is always an ongoing risk resulting from bad communication which results in individuals either not getting on board with a topic or going off and doing needless work. Today I really rallied against the endless stream of emails I had been cc’d into. I realised that I am probably as guilty as others in doing this so I decided I should figure out some guidelines for tightening up my e-mail etiquette

    My guidelines;

    1)If you are replying delete generic titles and write a title which is more specific about what is contained in the e-mail. (Try not to use Re: if you have to state Reply )
    2)Spend time making and crafting a really relevant reply which is as targeted as possible.
    3)If possible delete the train wreck of replied e-mails – most of them are not read by anyone and quite often have all sorts of tags, addresses and generic images which are totally irrelevant.
    4)Be economical in cc e-mails if you want to introduce others into a project – write a specific introduction e-mail for that individual explaining everything don’t just copy them into a massive e-mail and expect them to go back through and figure out what is going on.
    5)If you have questions that you need answered really start with the question and explain the context.
    6)Use pictures – They are useful and e-mails really support pictures very very well now.
    7)If you have simple calculations from excel spreadsheets contain them as images in the e-mail attachments are annoying and take time to open up.
    8)If you are working with people on a project you really need to have met the people. If they are in your building why not go and introduce yourself?
    9)Hey use the phone its there it costs nothing again more important if you don’t know the person.
    10)Don’t just write with questions – if you have an outcome that you think is important or you’ve received some positive feedback after project completion let the others on the project know about it.
    11)Generally aim to be positive and supportive
    12)If you make commitments try to remember them and stick to them.